Email - Connecting Apple Mail to Exchange 2010
For further assistance
Contact your desktop support specialist
Help Desk: 585-275-2000
Email: University IT Help
What is IMAP?
IMAP stands for Internet Message Access Protocol. It is a method of accessing electronic mail that allows multiple computers and mail clients access the same mailbox. All of your mail will stay on the mail server, this allows you to connect to the mail server from any computer, and see all of your mail. For example, email stored on an IMAP server can be manipulated from a desktop computer at home, a workstation at the office, and a notebook computer while traveling, without the need to transfer messages or files back and forth between these computers. IMAP was originally developed in 1986 at Stanford University.
An IMAP connection is the recommended method of connecting to Zimbra with 3rd party mail packages, since this allows multiple programs to access your mailbox, and allows the University to continue to backup your mailbox.
How to Connect
- Open Apple Mail
- Open Apple Mail Preferences (Mail -> Preferences)
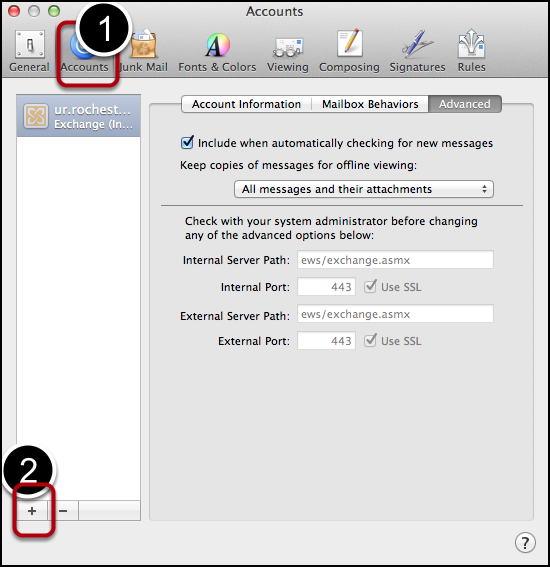
- Select the Accounts icon (#1)
- Select the "+" (plus) icon to add a new account (#2)
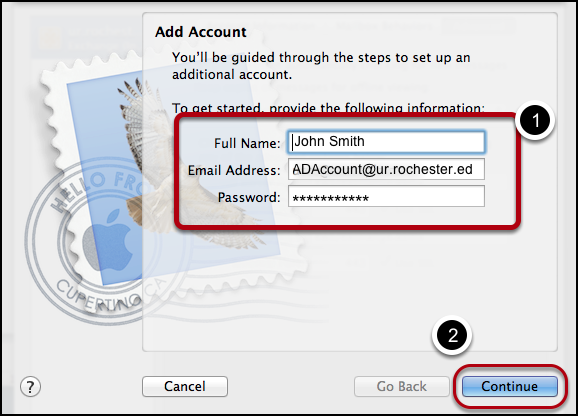
- Fill out the Full Name, Email Address, and Password fields.
- Full Name - Represents the presented name in the from field, for example, John L Smith. Do not place your email address here, just your name.
- Email Address - This is your email address for the Zimbra service (e.g.jsmith@ur.rochester.edu).
- Note: Do not place your first.last email address here.
- Password - Please enter your Active Directory Password.
- Then select Continue (#2)
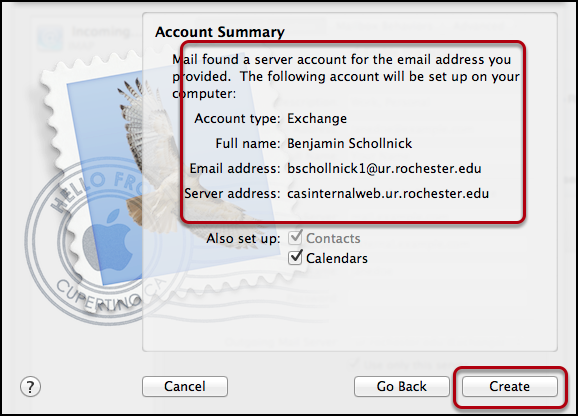
- Account Type - Ensure that Apple Mail has identified it as an Exchange Account.
- Full Name - Should be your name.
- Email Address - Is your Exchange user name. If you have a First.Last established, that is managed elsewhere.
- Server Address - Should be casinternalweb.ur.rochester.edu.
- To use Ical / Calendars, and Address Book / Contacts, ensure that Contacts and Calendars are also checked to be setup.
- Then select Create.
- Apple Mail will now setup the account, and start downloading and processing email from it.