How To Get It 3D Printed
3D Printing is a process of stacking layers of material to form arbitrary shapes. There are many options you could consider in both methods and the materials, and this article will narrow the field to the typical options available to students during the last update (2016). You can find campus facilities and businesses that offer 3D printing services listed at the Fabrication Resources page.
You will need a printable CAD model of your piece, likely in the .STL file type, to have it printed. “Printable” means having a geometry that can be created from stacking layers of material, see “Design for Successful Prints” for more details.
Contents: |
Give us your 30-second thought about how we did today!
Types of Printing and Their Materials
The type of printing method affects the appearance, feature size, and cost of the pieces you receive.
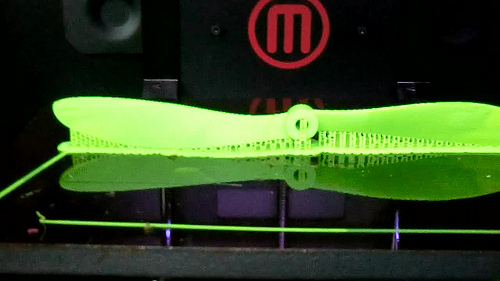
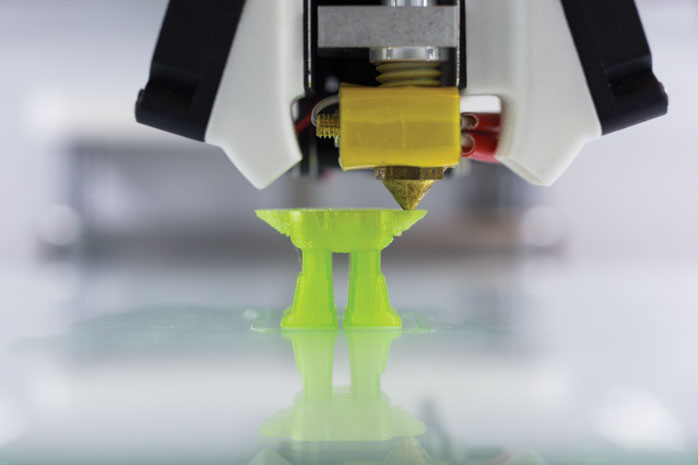
Fused Deposition Modeling (FDM)
Fused Deposition Modeling is the most common printing method available to students, and the first printing method most people become familiar with. FDM printers use heated extruders to lay-down melted plastic. Piece quality can vary from flaky and cheap-looking to highly aesthetic and durable depending on the quality of the printer and post-production processes like sanding and chemical smoothing.
Some FDM printers have multiple printing extruders, allowing you to print with multiple filaments at once. Multicolor parts can be made without painting, and dissolvable materials can be used to temporarily fill voids that would otherwise make a part unprintable.
Material for FDM printing comes as plastic filament on a spool. PLA and ABS are the cheapest and most commonly available filaments, and they are almost universally compatible across the various FDM printers. Nylon is sometimes available and compatible as well. Many other plastics have been developed for FDM printing, but some printers are not capable of/not calibrated for the heating patterns they require.
Simple Guide to FDM Filament (PDF)
Thorough Guide to FDM Filament
If you are to provide the filament, make sure you get a filament thickness and spool dimensions that are compatible with the printer you are using. That information should be included in the printer's technical documentation.
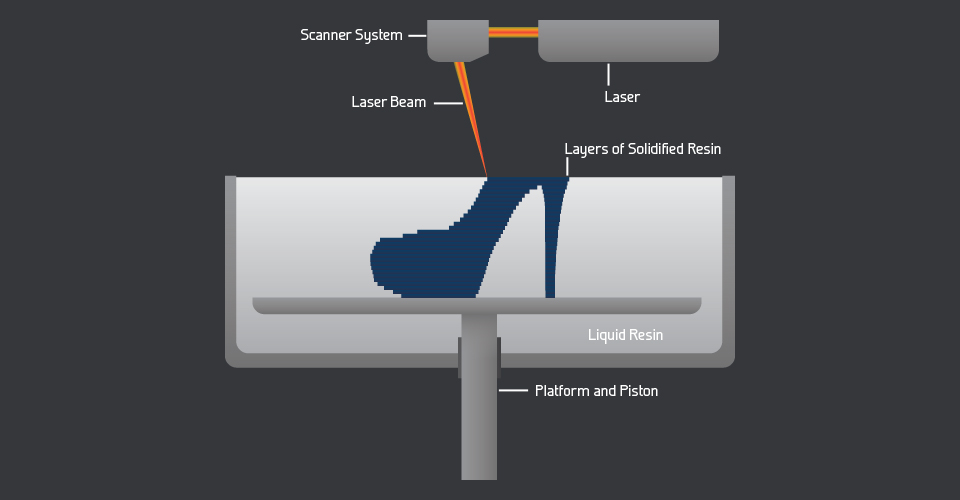
Stereolithography Printing (SLA)
Stereolithography printing is also available on-campus and surpasses FDM printing in terms of minimum feature size, mechanical strength, and material cost. It uses focused lasers to solidify very small portions of a liquid polymer bath at a time, producing layers so fine that they look like molded parts. SLA printed parts have better layer adhesion (more mechanically robust) an can have much thinner features as well.
The cost of SLA printing is justified if you require a very small or precise shape that would be difficult to create with FDM and shop processes. It may also be useful if the layers of an FDM printed part break or wear too easily for your application
More Thorough FDM vs SLA comparison
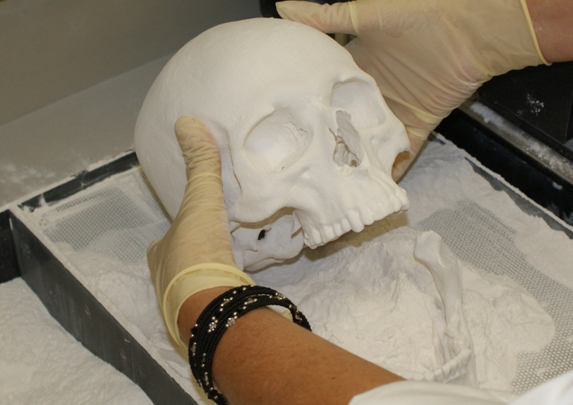
Powder-Binder Printing
Powder-Binder printing is available at many businesses, but not on-campus at the time of writing. It prints a pattern of glue onto the surface layer of a bed of fine powder, fusing some the current layer with the previous layer. Since every layer is surround by non-glued powder, there is no chance for layers to fall-through like there is for SLA and unsupported FDM. This allows you to make complex hollow parts with very fine feature resolution.
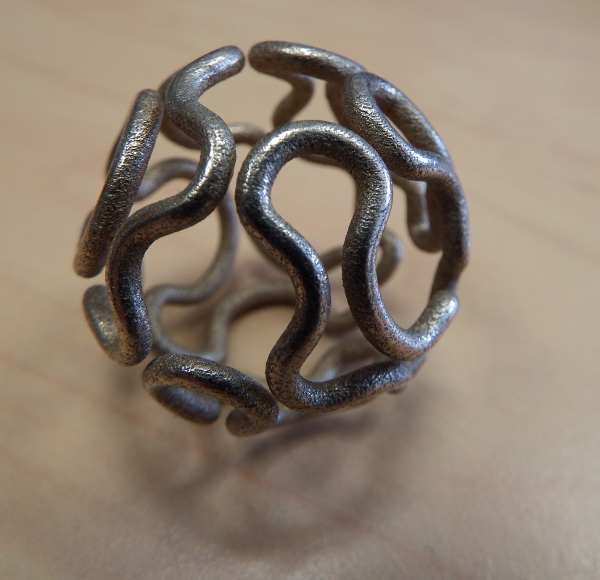
Selective Laser Sintering (SLS)
Selective Laser Sintering is available at some businesses, but not on-campus at the time of writing. Sintering is the process of melting a powder, typically a metal, into a cohesive shape. SLS uses sintering to form parts from a bed of powder in a similar fashion to how Powder-Binder printing uses glue. If you need a metal part that is difficult to machine and in a quantity that doesn't justify molding, SLS may be right for you.
Printing Parameters
When you go to print a part, you will need to specify a few details about your part.
% Infill
3D Printed parts do not need to be completely solid, and allowing the printing software to fill the inside of your part with hollow structures will save a lot of print time and material cost. Naturally, using less material sacrifices of mechanical strength. 20-30% is usually sufficient for aesthetic parts. Tall parts or parts that will be handled a lot would benefit from being closer to 50% filled. Load-supporting parts may need to be filled even more.
Layer Thickness (aka Layer Height)
Layer thickness is how much height is added to the part with each additional layer. In other words, it is how many layers are used to build the part. Thinner layers means better part resolution at the cost of additional print time. 0.1mm thickness is usually the high-resolution setting for FDM printers while 0.3mm is low resolution but three times faster.
Number of Surface Layers (aka Shells)
Printed parts are 100% solid at their surfaces, and you can choose how many layers deep the surface goes before the infill pattern takes over. A thicker surface resists caving-in better at the risk of deteriorating part appearance. At least 2 layers and no more than 5 is recommended for FDM printing. Greater % infill also improves surface support, but at much higher costs.
Design for Successful Parts
Every method of 3D printing has limitations that you must design around to have a successful print.
In General:
- Every printer has a minimum width it can print, also called the minimum feature size. Any regions in your CAD model with a lesser width will print incorrectly or not at all. The minimum feature size is usually listed in the printer's technical documentation.
- A model that prints well may not do so when scaled up/down. Don't just assume, re-evaluate the design.
- A shape that is not well-suited to being 3D printed (e.g. bad geometry, too large) may be possible as multiple printable sections glued together.
FDM and SLA:
- Orienting your part on the print bed to have a wide bottom layer helps immensely with with keeping the part still during printing. Alternatively, you can add a false bottom layer called a Raft that your part is printed on top of (raft addition is usually done by printer software)
- Overhanging features (printing over voids) are possible because overlapping layers hold each other up. Different printers have different capacities for this, generally 20 - 45 degrees with the vertical axis depending on layer thickness and feature height.
- All overhanging features can be made if you print a removable supporting material underneath them. Supports create rough patches on the part and raise material and time cost, so self-supporting features are still desirable.