
Using the WYSIWYG Field
Some content fields do not allow you to specify a format for your text because the format is part of the standardized layout. For example, the “Page Title” field allows you to enter the title that appears at the top of the web page, but its format is built in to the page layout and cannot be changed.
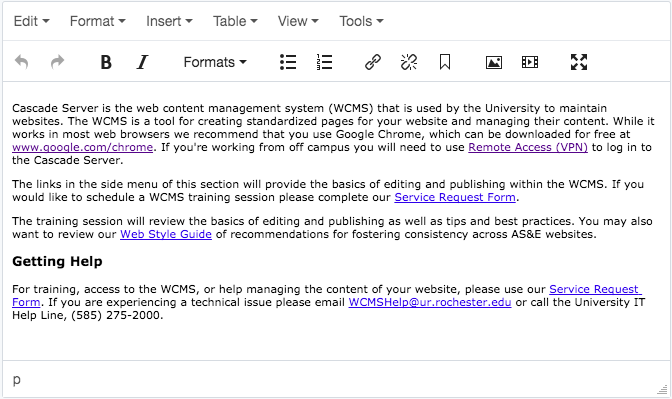
The main content of the page is entered into a special WYSIWYG field. Its name is an acronym that stands for, “What You See Is What You Get,” and it has its own toolbar that allows you to format text. This toolbar has buttons for Bold, Italic, Bullet List, and many other features that you may be accustomed to seeing in a word processing program.
Adding content in the WYSIWYG field:
- Select a page
- Click the Pencil icon to edit the page
- Click in a WYSIWYG field and type your text
- Press the Enter or Return key on your keyboard
Tip: It is very important to press the Return key every time you add text in the WYSIWYG field, because the text may not be displayed on the page if you forget. - Click the Submit button
Your changes will be saved in the WCMS after you click Submit, but they will not appear in your website until the page is published.
The figure below is a screen shot of a WYSIWYG field.
Using some features of the WYSIWYG toolbar:
Applying a Subheading
You can add preformatted subheadings in the WYSIWYG field by using the Formats dropdown in the toolbar. The "Heading" styles are equivalent to the "H" tags in HTML. The text size of any particular level of heading is usually larger than the regular paragraph text, but the appearance is dependent on the design of the layout of your site.
- Click the Pencil icon to edit the page
- Click in the WYSIWYG field and type the text
- Select the text with your mouse
- In the Formats dropdown, select "Headings" and then select "Heading 3"
- Click Save & Preview and then Submit
Applying a Bold Style
- Click the Pencil icon to edit the page
- Click in the WYSIWYG field and type the text
- Select the text with your mouse
- Click the "B" button in the toolbar
- Click Save & Preview and then Submit
Removing a Style
Tip: If some existing text already has a style, like bold, and you want to revert it back to plain text, use “Clear formatting” in the Format dropdown.
- Click the Pencil icon to edit the page
- Select the existing, styled text in the WYSIWYG field with your mouse
- Click the Format dropdown in the top row of the toolbar and select "Clear formatting"
- Click Save & Preview and then Submit