
Placing an image on your page
An image can be added to a page that is stored in the WCMS, but before you can use it on your page, you must upload it to the WCMS as a JPEG, GIF, or PNG file. Images can be either uploaded while you are editing a page, or they can be uploaded in advance. To upload one or more images in advance see Uploading an Image. For standard image sizes see our web style guide.
To place an image on your page:
- Click on the page where you want to place the image
- Click the Pencil Icon to edit your page
- Click in the WYSIWYG field where you want to insert the image
- Click the "Insert/edit image" button in the toolbar

- In the window that pops up, select "Internal" for the type of image
- Next to the "Image" label click the button to choose an image file
- If your file is in the recent list you can choose it from there, if not, choose either "Browse" to choose a file you previously uploaded or "Upload" to add a new file
- If you choose "Browse", you may need to navigate to the images folder by selecting the site folder then assets and images
- If you choose "Upload", follow the steps described in uploading an image
- Click on the image you want, then click Choose
- Fill in the "Image description" field with a brief description of the image (to comply with accessibility guidelines)
See Alt-texts: The Ultimate Guide for help writing image descriptions. - Fill in the width and height fields if they did not fill in automatically (use pixel dimensions)
- Click OK
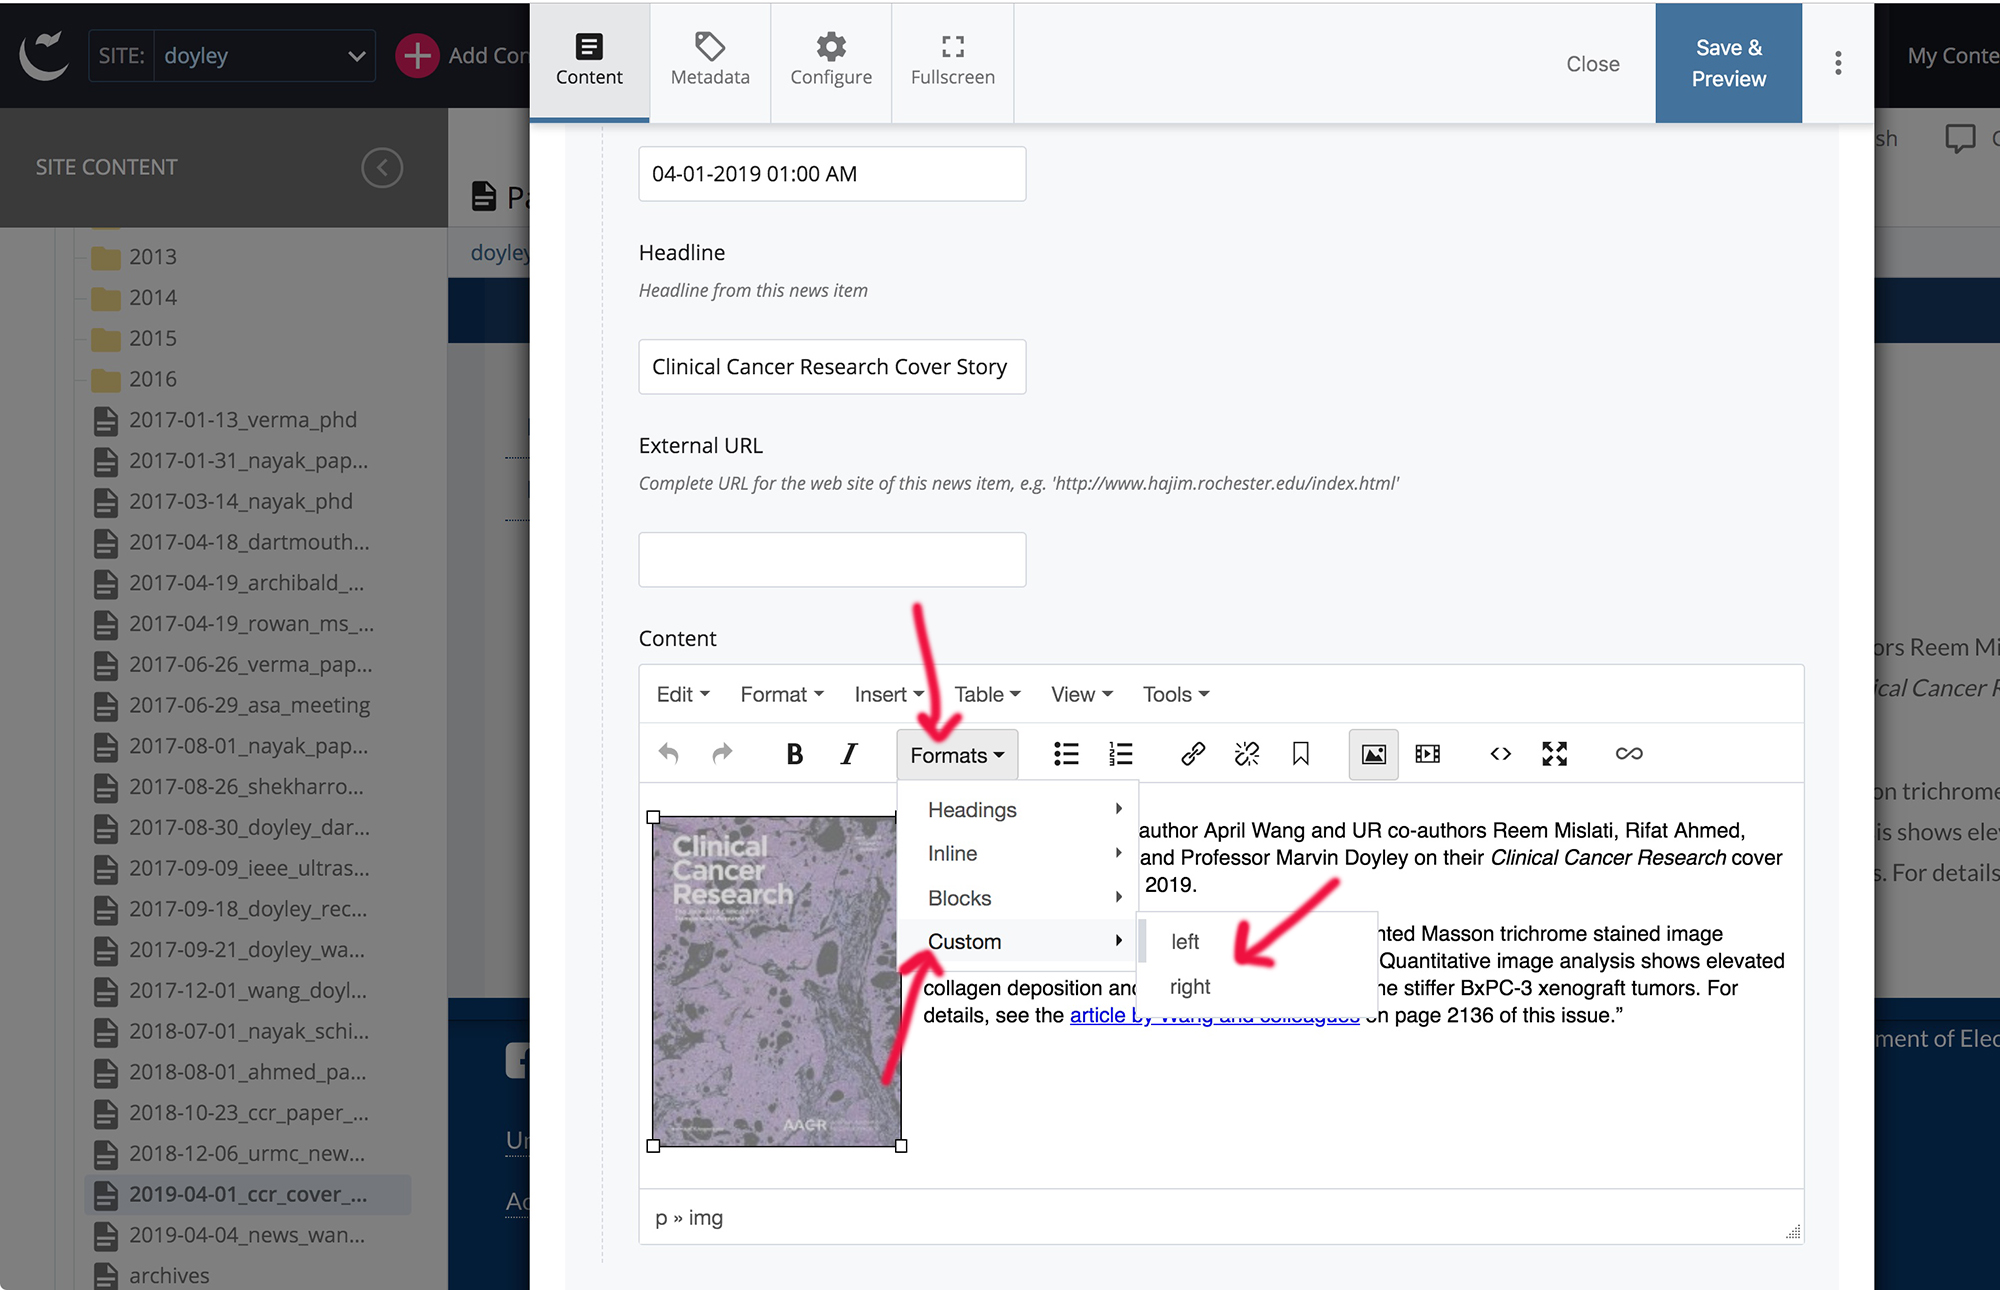
Tip: You can force the text to wrap around the image on either the left or right by clicking on the image in the WYSIWYG field and then applying the appropriate float (either left or right) from the Formats/Custom dropdown in the toolbar.